What is on-page SEO? On-page or on-site SEO is the process of optimising parts of your web page content for search engines and users so that it ranks in SERPs and brings traffic to your site. It’s done by optimising various front-end and back-end components of your site.
Mastering the art of on-page SEO is an essential skill for anyone looking to maximise their website's visibility. Crafting well-optimised titles, slugs and meta descriptions can significantly impact your site's click-through rates, search engine rankings and overall user experience.
The main on-page SEO fundamentals are based on HTML elements, content elements and site architecture elements.
In this on-page SEO guide, we'll look at how to optimise these elements that are a quick way to get found and understood by both humans and search engine crawlers.
How to Create Page Titles and Meta Descriptions on WordPress
Keeping the most important factor in mind, you want your page titles and meta descriptions to conform to Google's guidelines and SEO best practices.
Page titles and meta descriptions are powerful components of your website. Although they might seem like small details, they are a vital part of SEO and getting the most out of your organic search traffic. By making sure to optimise page titles and meta descriptions you can ensure that search engines as well as humans will find what they’re looking for quickly and efficiently on your site.
To get the most out of optimising these, make sure to follow best practices including writing descriptive copy, including keywords, targeting readers rather than search engines and keeping the length within an optimal limit.
How to Create SEO Optimised Page Titles
What we recommend in this on-page SEO when writing SEO titles is:
Be clear and concise. Communicate with the reader what to expect.
Use actionable words. Draw the readers' attention by using words that create a sense of urgency or excitement. For example, “discover”, “learn”, “unlock” or “master”.
Use numbers. Numbers attract the attention of readers. Use them in your listicles or step-by-step guides.
Highlight the benefits. Highlighting the benefits or value of your title makes the readers want to interact with your content. Your title lets them understand what they will learn, solve, or achieve when they read your content.
Incorporate keywords. Incorporating keywords in your title helps search engines understand what your content is about. This gives you a chance to become visible on the SERPs and rank.
Use power words. Power words emotionally connect to your audience and evoke reactions. Use words like 'ultimate,' 'essential,' or 'effective' to add impact and persuasion.
Maintain the desired title length. Write a title that is at most 65 characters. You can use tools like metatags.io to check if you have the desired length.
Let’s jump into a step-by-step guide you can follow to create page titles in minutes:
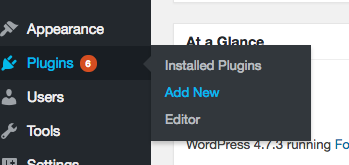
Step 1: Log in to your WordPress account. If you don’t have the Yoast plugin installed, go to Plugins and click on “add new”.
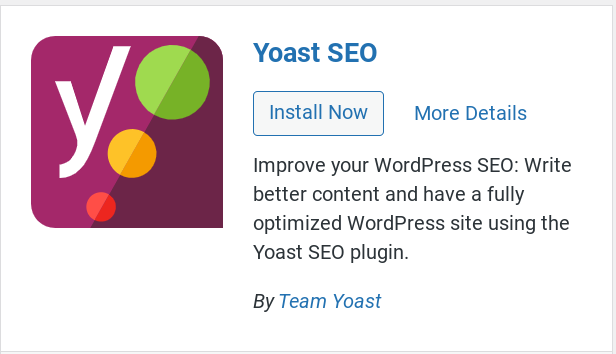
Step 2: Type “Yoast” in the search bar that appears.
Look for the Yoast SEO plugin and click on “install” then “activate”.
Step 3: Your Yoast plugin is now up and running. To create your title tag, use the “menu” tab on the left side of the screen and select “page”. From the drop-down menu that’ll appear, click on “all pages” and identify the page you want to add a title tag to and click on “edit”.
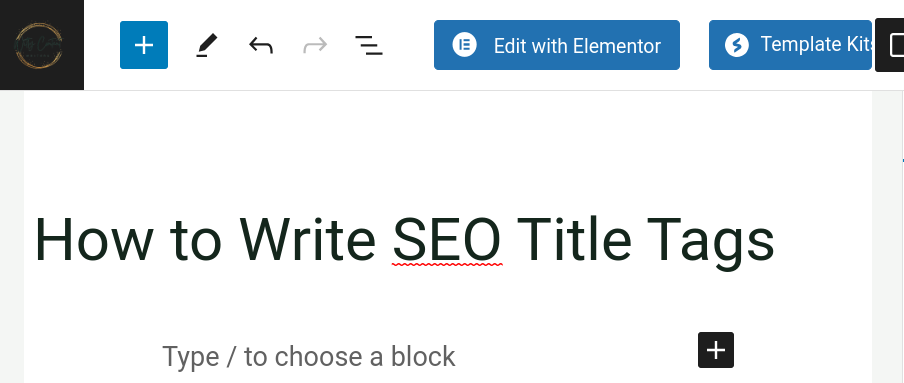
Step 4: In the Yoast box that appears, type in the title of your page. Remember to follow the considerations listed above.
Step 5: Once you're satisfied with how your title looks, hit “publish” to save the changes.
An On-Page SEO Guide for Writing SEO Optimised Meta Descriptions
A meta description is a HTML attribute placed in the <head> section of a page's source code. It is displayed in SERPs below the title tag.
A meta description should be clear, concise and unique and serve as a summary of a page, accurately reflecting its content.
It should ideally be between 50 and 160 characters long. Anything longer will get truncated and lose its meaning as shown in the image below.

Be sure to include relevant keywords to help search engines understand the context and topic of the page and improve the visibility in search results. The keywords should appear naturally and not sound forced.
Though it isn’t in itself a ranking factor, make the meta description compelling enough to encourage users to click on your page in SERPs. This can increase the visibility and the click-through rate (CTR) of a site.
Avoid clickbait by any means. Deceptive or misleading meta descriptions cause a bad user experience ( UX) which could negatively impact your website.
Here’s a step-by-step guide on how to write meta descriptions:
Step 1: Now that you’ve already installed the Yoast plugin using the steps above, use the “menu” tab on the left side of the screen and select “page”. From the drop-down menu that’ll appear, click on “all pages”. Identify the page you want to add a meta description to and click on “edit”.
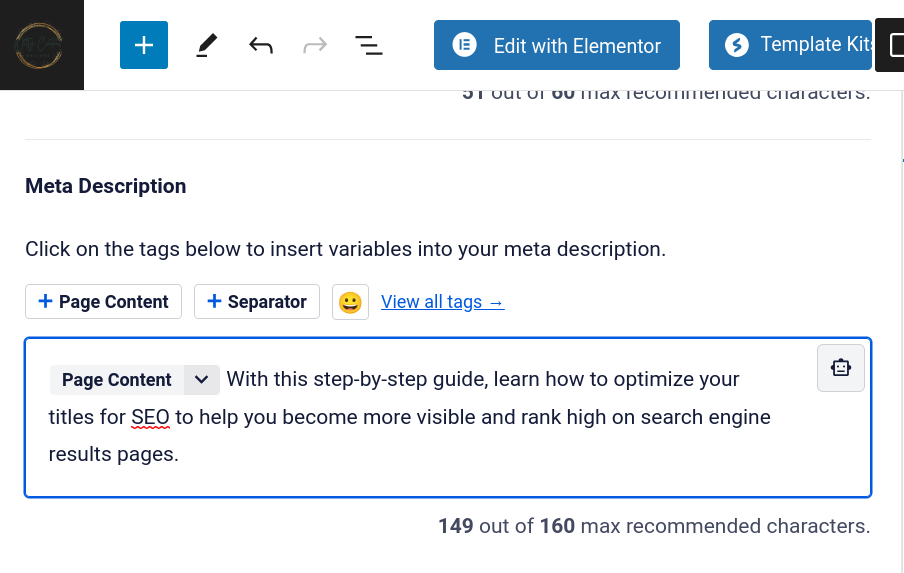
Step 2: Next, scroll down and enter your meta description as in the image below.
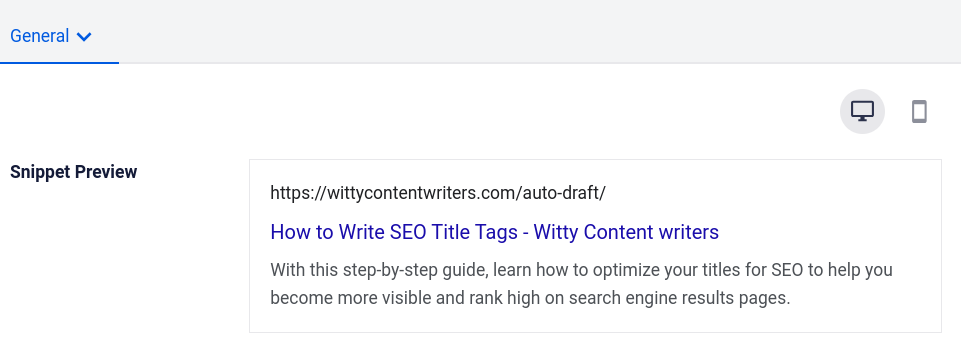
You’ll notice that there’s a snippet preview showing how your meta description will appear in SERPs.
Step 3: Once you’ve followed the meta description considerations listed above, and are satisfied with what you see, hit “publish” to save.
How to Write SEO-Optimised Slugs
A slug is the text in a page’s URL that appears after the last slash (/) in the address bar of a browser. It helps differentiate one page from another.
Slugs should be meaningful, timeless, short, concise, clear and easy to read slag. This helps search engines and readers identify what the page is about and, done well, can help boost your SEO efforts and drive traffic.
When writing the slug avoid acronyms and abbreviations to avoid confusion to general users and crawlers unless they’re widely recognised and used. Also, remember to include keywords that read naturally.
Using special characters like exclamation marks, hashtags, question marks, dollar signs or percent signs isn’t a good idea. Try and avoid articles like "a" and "an" and “the” because they make the slug unnecessarily long. Stick to letters, numbers, underscores or hyphens for better compatibility across different pages and for bots and readers to easily understand the URL.
Here’s how to add a slug name to your URL in minutes:
Step 1: Log into your WordPress backend. In the menu on your left-hand side, go to “page” or “post”, then select “all pages” or “all posts” from the drop-down menu.
Step 2: Identify the post or page you want to add a slug to and click on the “quick edit” option.
Step 3: Type in your slug. Remember to follow the rules that apply to slugs for better optimisation.
Step 4: Click on “update” for your new slug to go live.
Wrap Up
By following the step-by-step instructions outlined in this on-page SEO guide, you can create slugs that are concise, descriptive, and keyword-rich. Your titles should be attention-grabbing, yet accurately represent the content, while meta descriptions provide a sneak peek into what readers can expect on your page.
Remember to keep them within the recommended character limits to ensure they appear correctly on search engine results pages.
On-page SEO is an ongoing process. As search engines continue to refine algorithms and user behaviour evolves, the importance of on-page SEO remains constant.
Remember to regularly review and refine your titles, slugs and meta descriptions for improved organic search traffic and a more valuable, discoverable user-friendly website for humans first and search engine crawlers.
Follow these simple steps and watch as your website starts to rank high on SERPs, attract more clicks, and deliver a seamless experience for your target audience.
Download The SEO WTF Guide to Effective On-page SEO Checklist under the image below or visit our blog for more resources.


